Thursday, June 28, 2012

QR Code Scavenger Hunt!

I usually do a scavenger hunt every year with hard copies of the clues placed in envelopes and hidden around the school. I teach 6th graders, and this is their first time coming to the big, scary middle school, so this is a fun little way to show them around. This past year, a sweet little student asked me why I didn’t just save time/paper/effort and use QR codes. DUH! Thanks, Meredith! :)


Thus, the QR Scavenger Hunt was born! It took me a while to figure the logistics of the whole thing out--my brain just doesn't work that way! Honestly, I haven't tested this out with kiddos yet, but I pink puffy heart love how it turned out! 


HOW IT WORKS:
Basically, all you have to do is divide the students into groups, making sure that each group has at least one smartphone/ipod/ipad/etc. with a QR code reader on it. (This is a FREE app. Just type in "free qr code reader" into the app store, and pick one to download. Some are more fancy than others, but they all get the job done!)


Once the students are divided up, go over the rules--don't run in the hallways, stick together, inside voices, no running away (you think I'm kidding--happened to me last year...IN 6TH GRADE!), etc. Then, have each group scan the first clue. You could either print it off, or project onto the screen.


Scavenger Hunt Clue Number One!
(This is what the students will see!)


I send the groups off a couple minutes apart so that they are actually reading the clues, and not just chasing each other around the building. I'm going to have one person in each group be in charge of "keeping time" on their phones. The group that finishes with the shortest time, wins! But really, they're all winners. They got to do something really fun at school! Heehee!


TEACHER STUFF:
Open up this file, and print the pages. Each page will be a poster to hang around the school (they're labeled with the location). Next, work your teacher magic on the kids so that they know how to behave in the hallways. (I usually send out an email to the whole school to let them know that I have groups of kids wandering around the hallways WITH my permission.) Finally, send them off on their hunt! There are 10 clues total, so it shouldn't take too long...


*In order for the QR codes to actually link to something, I created a very, very, very basic website. Nothing fancy. Here's the link to that site: http://qrscavengerhunt.wordpress.com/ There are different pages for the clues, but the kids should only see the clue that they scanned.

Well, what do you think? Hopefully, you can use this with your class!  
~Ansley

Monday, June 25, 2012

Brownie Points...

So I finally peeled off my pajamas got all dressed up and snuck up to my school yesterday to work with my teacher bestie on aligning last year's lesson plans to next year's Common Core. (That was a mouthful--did you follow that? I teach real good...) We had BIG dreams to knock it all out in one day. Needless to say, we'll be back today. And tomorrow. And the next day. Shoot, the only reason we aren't going in on Friday is because the building won't have any air! So much to do! We both looked over all of our stuff from last year and just felt BLAH about it all, so now we are going to recreate lessons for Language Arts for the ENTIRE SCHOOL YEAR. What is wrong with us?!?

Eh. So back to the point of this post...We kept having questions/technology issues/needing more books all day long. Which meant we kept bugging people--the principal, computer man, 8th grade teacher, etc. They were so helpful, so they're going to get a little treat tomorrow. A "sweet" treat if you will...


Want to say thank you (and sorry for bugging you) to the summer staff at your school too? I posted the FREE template for the sweet labels here. FYI--I printed two to a page, and that fits perfectly on a small zip-lock baggie.


Oh! And...Look, Ma, no pajamas! I broke my 2...er, 4... day streak!


Why yes, that IS a blow pop that I'm eating at 7:00 in the morning. It's summer!

~Ansley

Look what I made!

Happy Monday! I'm linking up with Fourth Grade Frolics today for the Monday Made It. I'm so excited to share my projects in my very first link up! (Hopefully I'm doing this correctly? Hmmm...)

Project #1 for Monday Made It -- I LOVED seeing all of the Teacher Toolboxes over the last couple of weeks. There are so many great tutorials out there--in fact, check out this post at Create.Teach.Share. She started it all! Here's how my little guy (girl?) turned out:


I have a navy, pink, and apple green theme going on next year--love those colors! Here are the labels I used:


I posted them on my TeachersPayTeachers site--grab them here for free if you're interested! There are also blank ones in the file.
_________________________________________________________________________________

And now for Project Number Two...Back story--I was running late for a meeting and couldn't find my snazzy  teacher clipboard, so I hastily grabbed one out of the pile that my students use. During the meeting, I had to stand up and share some data regarding testing blah blah blah that I had clipped into the clipboard. I noticed several of my friends laughing at me when I was speaking, but I seriously thought they were just giving me a hard time because they know how much I hate talking in front of large groups. And I'm a teacher. I know--it's weird...So when I sit down, I give them the lovely "teacher glare". They cannot stop laughing and motion for me to turn my clipboard over so I can see the back. Y'all. There was a HUGE drawing in bright PURPLE marker of a boy's "special place". I'm not kidding--I was so embarrassed!! Ahhh--the joys of teaching middle school...Needless to say, the very first thing on my summer agenda was to get these clipboards covered! In dark colors! With so much shellac that they can't write on them if they tried!!

I painted the fronts of the clipboards using the little bottles of acrylic paint. I used painter's tape to make the designs, them I just painted different navy, white, pink, & green sections.


No worries if you get the paint on the silver clippy part. Just wait til it dries and then wipe it right off with water and an old washcloth. Easy peasy.


After washing away my mistakes (I'm a messy painter!), I sprayed those bad boys with several coats of acrylic finishing spray. 


Now for the fun part. I painted the backs of the boards with chalkboard paint! I'm going to use these instead of whiteboards next year. I just need to wait til the back to school sales start so that I can buy 15 more without breaking the bank! While I was painting, I remembered my grandmother (who taught second grade) telling me about getting one of those new "fancy" white boards in her classroom. She was so excited to get rid of the chalkboard, and all of her teacher friends were jealous because she was getting the very first one in the whole school! Fast forward 20 years, and now her granddaughter is purposely putting chalkboard paint on things because it's "so cool"! Too funny! Hopefully, the novelty of writing with chalk with excite my students as much as it does me!


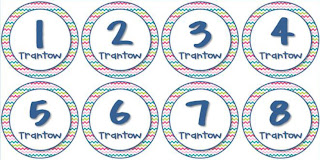
And the final step...I added numbered labels to all of the boards so that I can catch future wienie writers  keep track of them. :) I  covered the labels in Mod Podge the labels in hopes that they will last a while. If you're interested, you can get the labels for FREE here. There are blank ones too!


What can I make now?? :)
~Ansley

Saturday, June 23, 2012

Government & Economics???

Apparently I'm going all out with this whole "online presence" thing! I worked on and added a few things to my TeachersPayTeachers' store last night.

First, I saw the cutest birthday treat labels over on Fourth Grade Frolics for her Monday Made It. She even has a template that you can download for free! I really really really like hers, but I just purchased some sweet little owls from Jessica Weible that I was dying to use. Plus, I'm going with a navy, apple green, & pink color theme next year, so I wanted to make them in those colors. Oh, and the main reason I made my own version--I wanted them to fit inside my circle puncher. Hey--it makes cutting out 120 circles MUCH easier. I'm lazy, what can I say? Here's how they turned out:


Nowhere near as good as Tara's, but they'll do! You can download mine here.

I also decided to make some things for two of the hardest concepts for my kiddos to grasp -- can you guess what they are?? Economics and Government...whoo hoo! I love teaching these units to brand-new, baby sixth graders now, but I remember several years ago when I first found out that we had to teach these concepts. It was scary. There's no telling what I taught that group of kids! (Sorry 10th grade government teachers...) The kids really struggled with these abstract concepts (I think because they don't have much in their own lives to relate it to??), but these are the tried and true things that have worked in my classroom for the last three years.

Citizen Participation in Government -- Autocracy, Oligarchy, & Democracy can be found here.


Economic Systems -- Traditional, Command, & Market can be found here.


Oh, and by the way--most of the things in both units came from ideas that I've picked up from various staff developments over the years. The best, BY FAR, staff developments that I've attended were put on by the Georgia Council for Economic Education (specifically, led Mr. Glen Blankenship). If you live in Georgia (or if you live far away but need a mini-vacation!)--you must attend one of their workshops. They are incredible--I learn SO much every time. I've probably attended at least 10 now, and they are all amazing.

Happy Weekend!
~Ansley

Thursday, June 21, 2012

I DIY Inside.

I've been crafting up a storm inside of our little apartment lately, and I want to prove it to the world* (read: to my husband) that I've been doing other things beside staying in my pjs, eating bon bons, and watching Real Housewives of (fill in the blank with any city--I ain't picky) all day. Hello. I believe it's called "multi-tasking". I digress... I'm going to show one of my home crafty things first. (I'm saving my school crafty things for next week's Monday Made It on Fourth Grade Frolics. My first link up! I'm already nervous!)

Here is the Fabric-Covered Canvas with a Button Initial. (Hey, I'm not sure of the actual name--I just spied it on Pinterest!)


Basically, I just wrapped a canvas with chevron (my fav!) fabric and hot glued it to the back. Then, I traced a wooden T (that I pulled off of our wall) onto the fabric.


Next, I painted the T yellow and then started gluing down the buttons. So easy! Well, it would've been easy if I had enough yellow buttons... I ran out about halfway through. Being the lazy sloth that I am, I refused to drive 4 minutes to Hobby Lobby for more yellow buttons. Instead I painstakingly mixed the perfect color of yellow paint (not fun) and then proceed to paint purple, green, and orange buttons yellow. It took THREE coats! Which took about THREE hours to dry! Ridiculous, I tell you.Why didn't I just go buy more?? Anywho, I'm happy with how it turned out. It matches our Sunny Clouds (official name) bedroom perfectly.


Love! Now, back to RHONY/A/OC/NJ/DJALKNLEW:UIOADNSKADSAKL! :)
~Ansley

PicMonkey Saves the Day!

Have you ever heard of the site, PicMonkey? I've been playing around on it lately whilst editing my wedding pictures, and oh my goodness, I am in love! It is so cool! It can do ANYTHING! Think of it as an Instagram-type program for your computer. There are so many different effects/touch ups/borders, etc. that you can use--you've really must check it out.
Take this picture for example. I love the way that Bean (story on that later) is smiling at me, but I don't really like that you can see so many other people/things in the picture. I want us to be the focal point, and not everyone/thing else in the shot. Plus, the lighting is off and the whole thing looks a little washed out.


PicMonkey to the rescue! I played around with the effects, cropped it, blurred the edges, and sharpened yours truly--all in about 5 minutes. Look at it now:


I feel so artsy! Since I'm now addicted to this website, I decided I should put my time-wasting abilities to good use and I created the image for our Thank You cards.


We had about a million pictures of us doing cake-y things, so I decided to use them all! I edited them in PicMonkey, used one of the available templates, and added the text, "Thank you for being so SWEET!" (Get it??? Sweet. Cake. Ha! It took a bit for Bean to put it together...) I love how it turned out--it really pulled the whole vintage theme together. Ahhhhh...Oh, and it was free. :)

I'm using Snapfish to create the actual cards, and I'm super excited because I found a 20% cash back coupon via Ebates! WINNER!

PS--See the wreath? I made it myself! Out of falling apart books in my classroom! Maybe I will get brave/smart enough to do a tutorial on that soon...My wreath is ginormous, but I think a smaller one would be perfect for a classroom door. Maybe with a ribbon and READ letters glued on? Hmmm...


Happy day!
Ansley

Wednesday, June 20, 2012

Insert Witty First Post Title Here.

My freshly married husband goes to Chicago for work and leaves me for the week, so what do I do? I start a blog, of course.  I've been stalking all kinds of blogs for years--lifestyle, teaching, fashion, DIY, and most recently, even the beauty gurus on YouTube! I know, I have a problem. I'm tired of hiding behind my computer (I believe that is called "trolling"? Look how techy I am!); it's time for me to join in on the real fun!


I'm still not exactly sure what I aim to do here. Is that bad? I know I want to share/collect teaching ideas, but I also have a small passion for fashion (ha-see what I did there? So witty.) and a desire to keep track of the going-ons of newlywed life. Quite the conundrum, I think. 


While I'm trying to figure out my blogging niche, I'll leave you with these. I still can't stop smiling...


Perhaps next time my hubby goes out of town I can learn how to tweet? (Considering I've had a Twitter account since 2008, and I still haven't sent my first tweet...)


Wish me luck!
Ansley 


(Pretend like that is a cool signature button.)